First fpv build
Followed the lumenier johnny 5"
End goal is to build a UAV. Thought it would be a good idea to follow a more structured build that would teach me the basic best practices. Areas I wanted to cover:
- Refined soldering onto ESC's
- Flight controller calibration
- ESC intuition
Total build time was around 13 hours, including the calibration errors which needed to be fixed via the betaflight software.
The steps were pretty straightforward:
- Assemble frame
- Strip, shorten and tin the wires for the battery into the ESC, as well as the motor wires
- Tin the ESC pads, as well as the battery input pads & connect the respective wires to the board
- Assemble DJI air unit 04 pro as well as camera to the frame
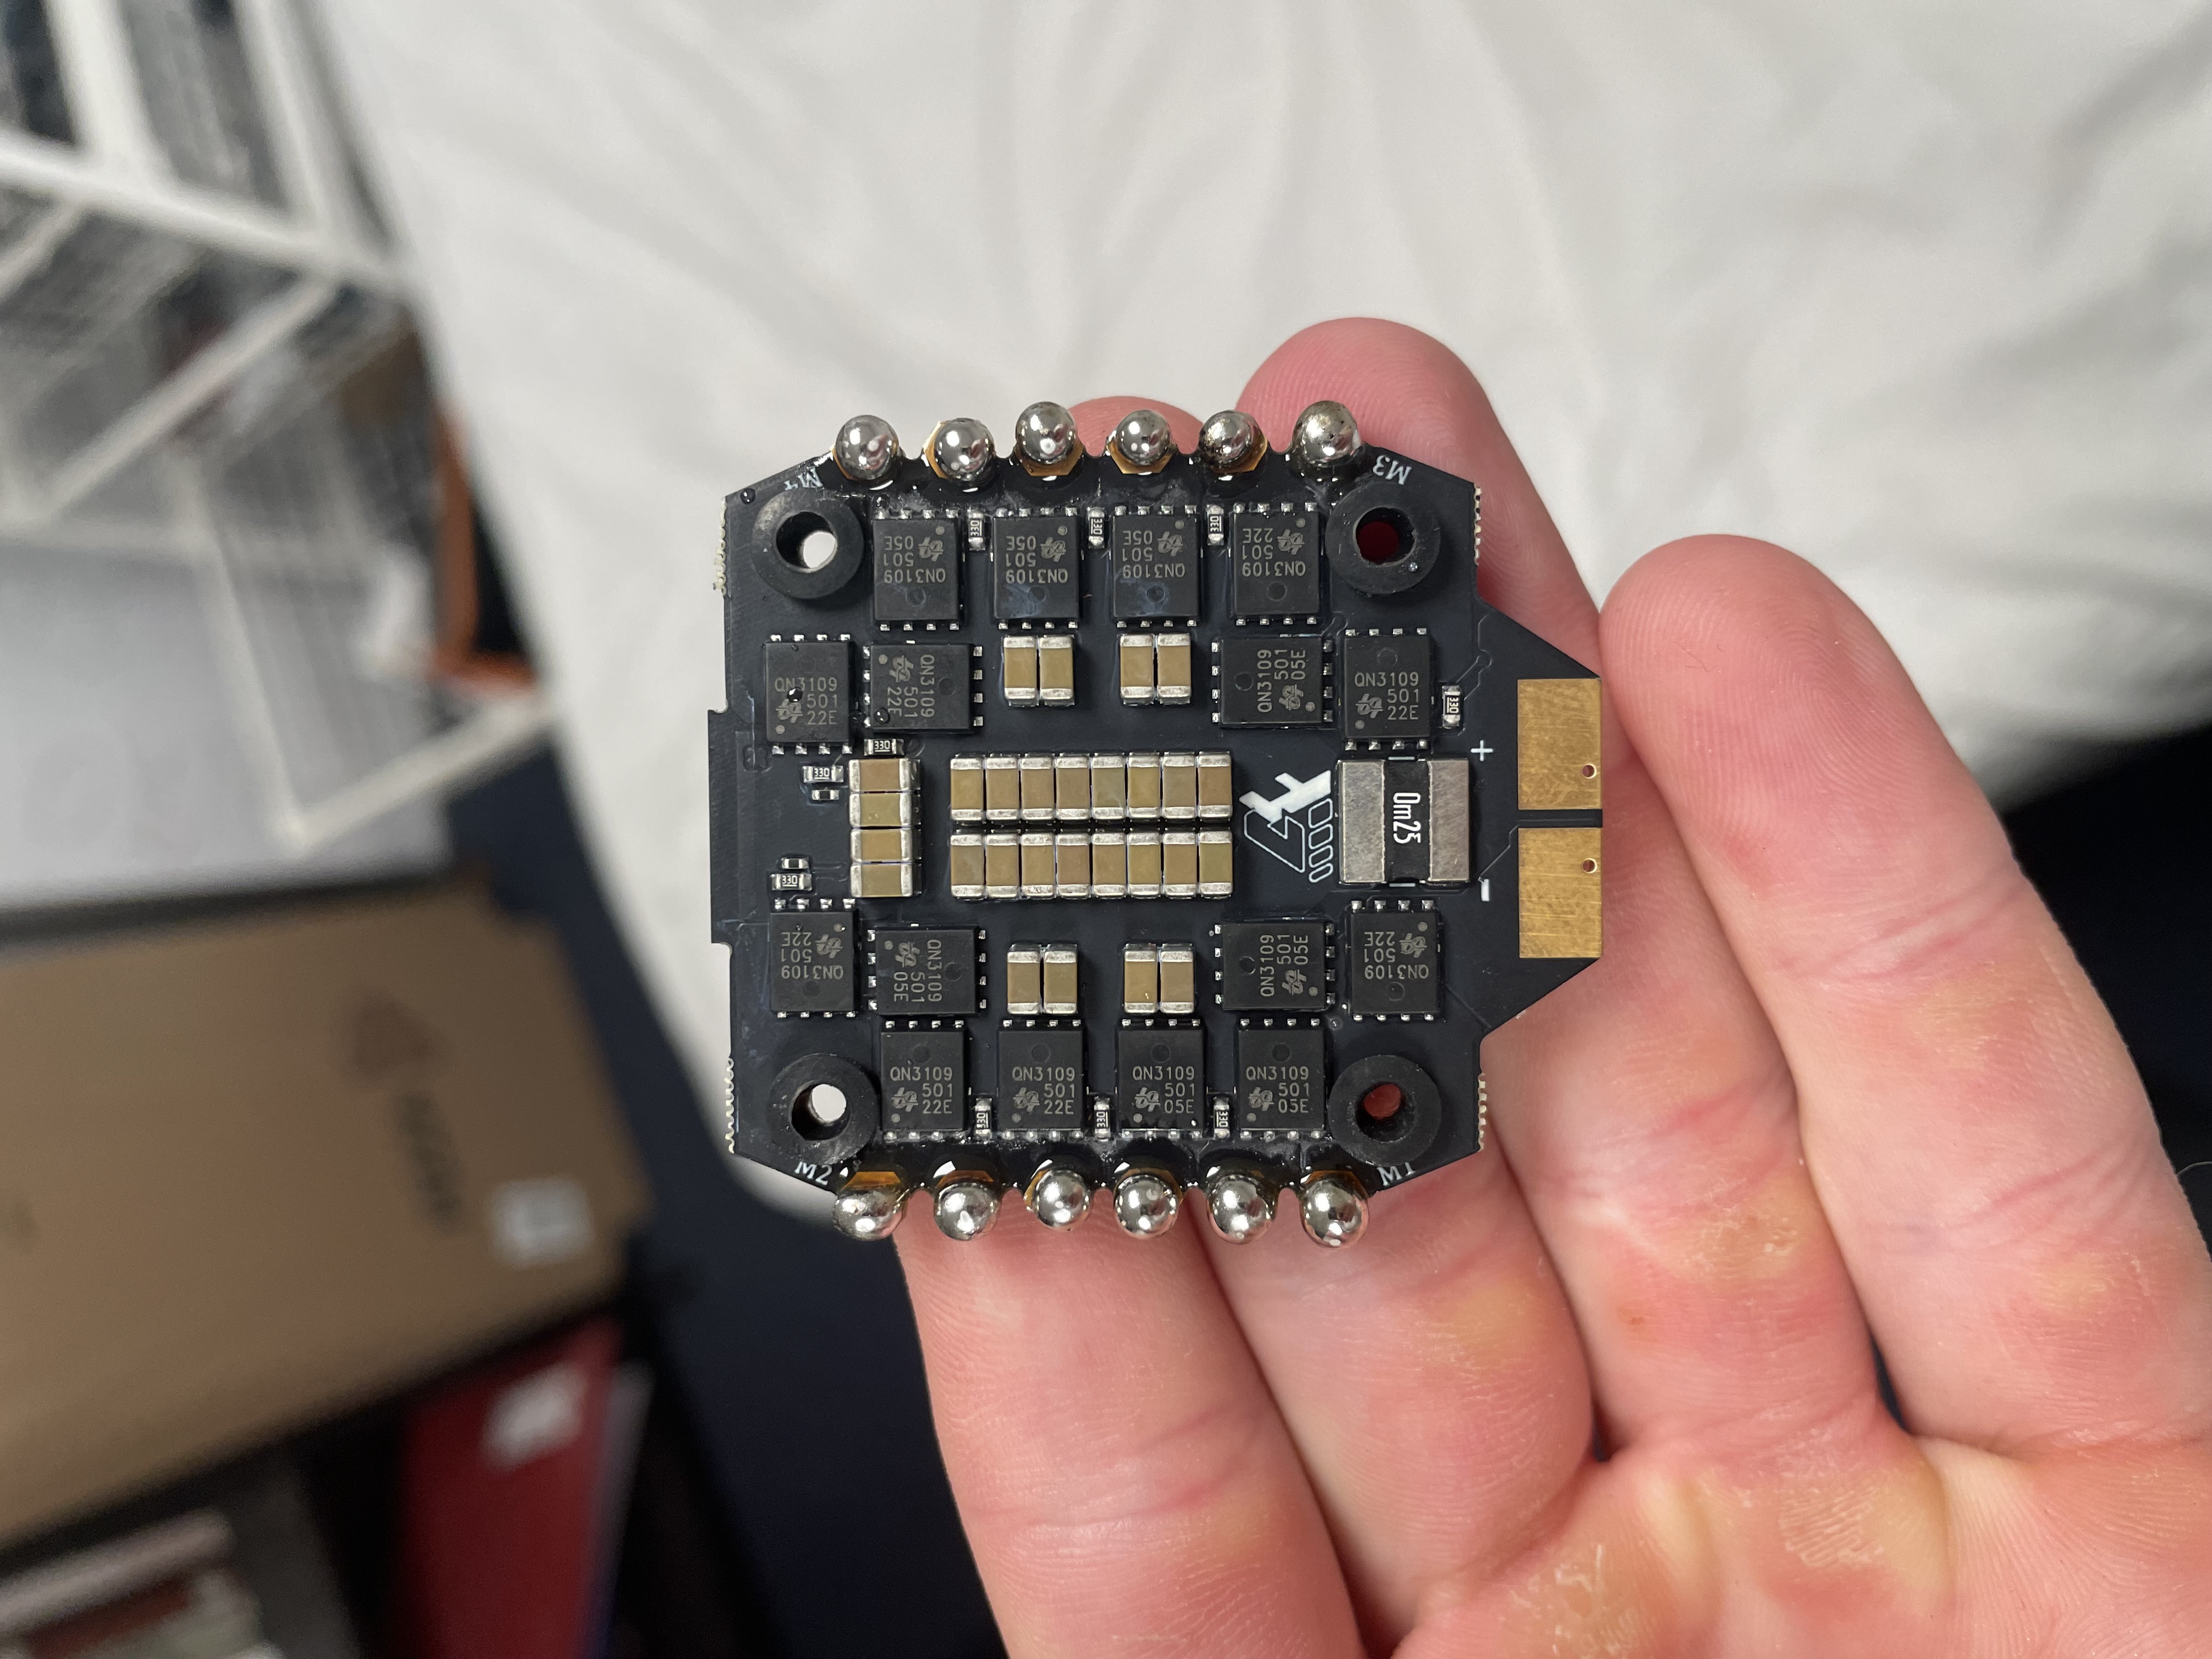
From here it was pretty straightforward to solder the motor wires to the pads.
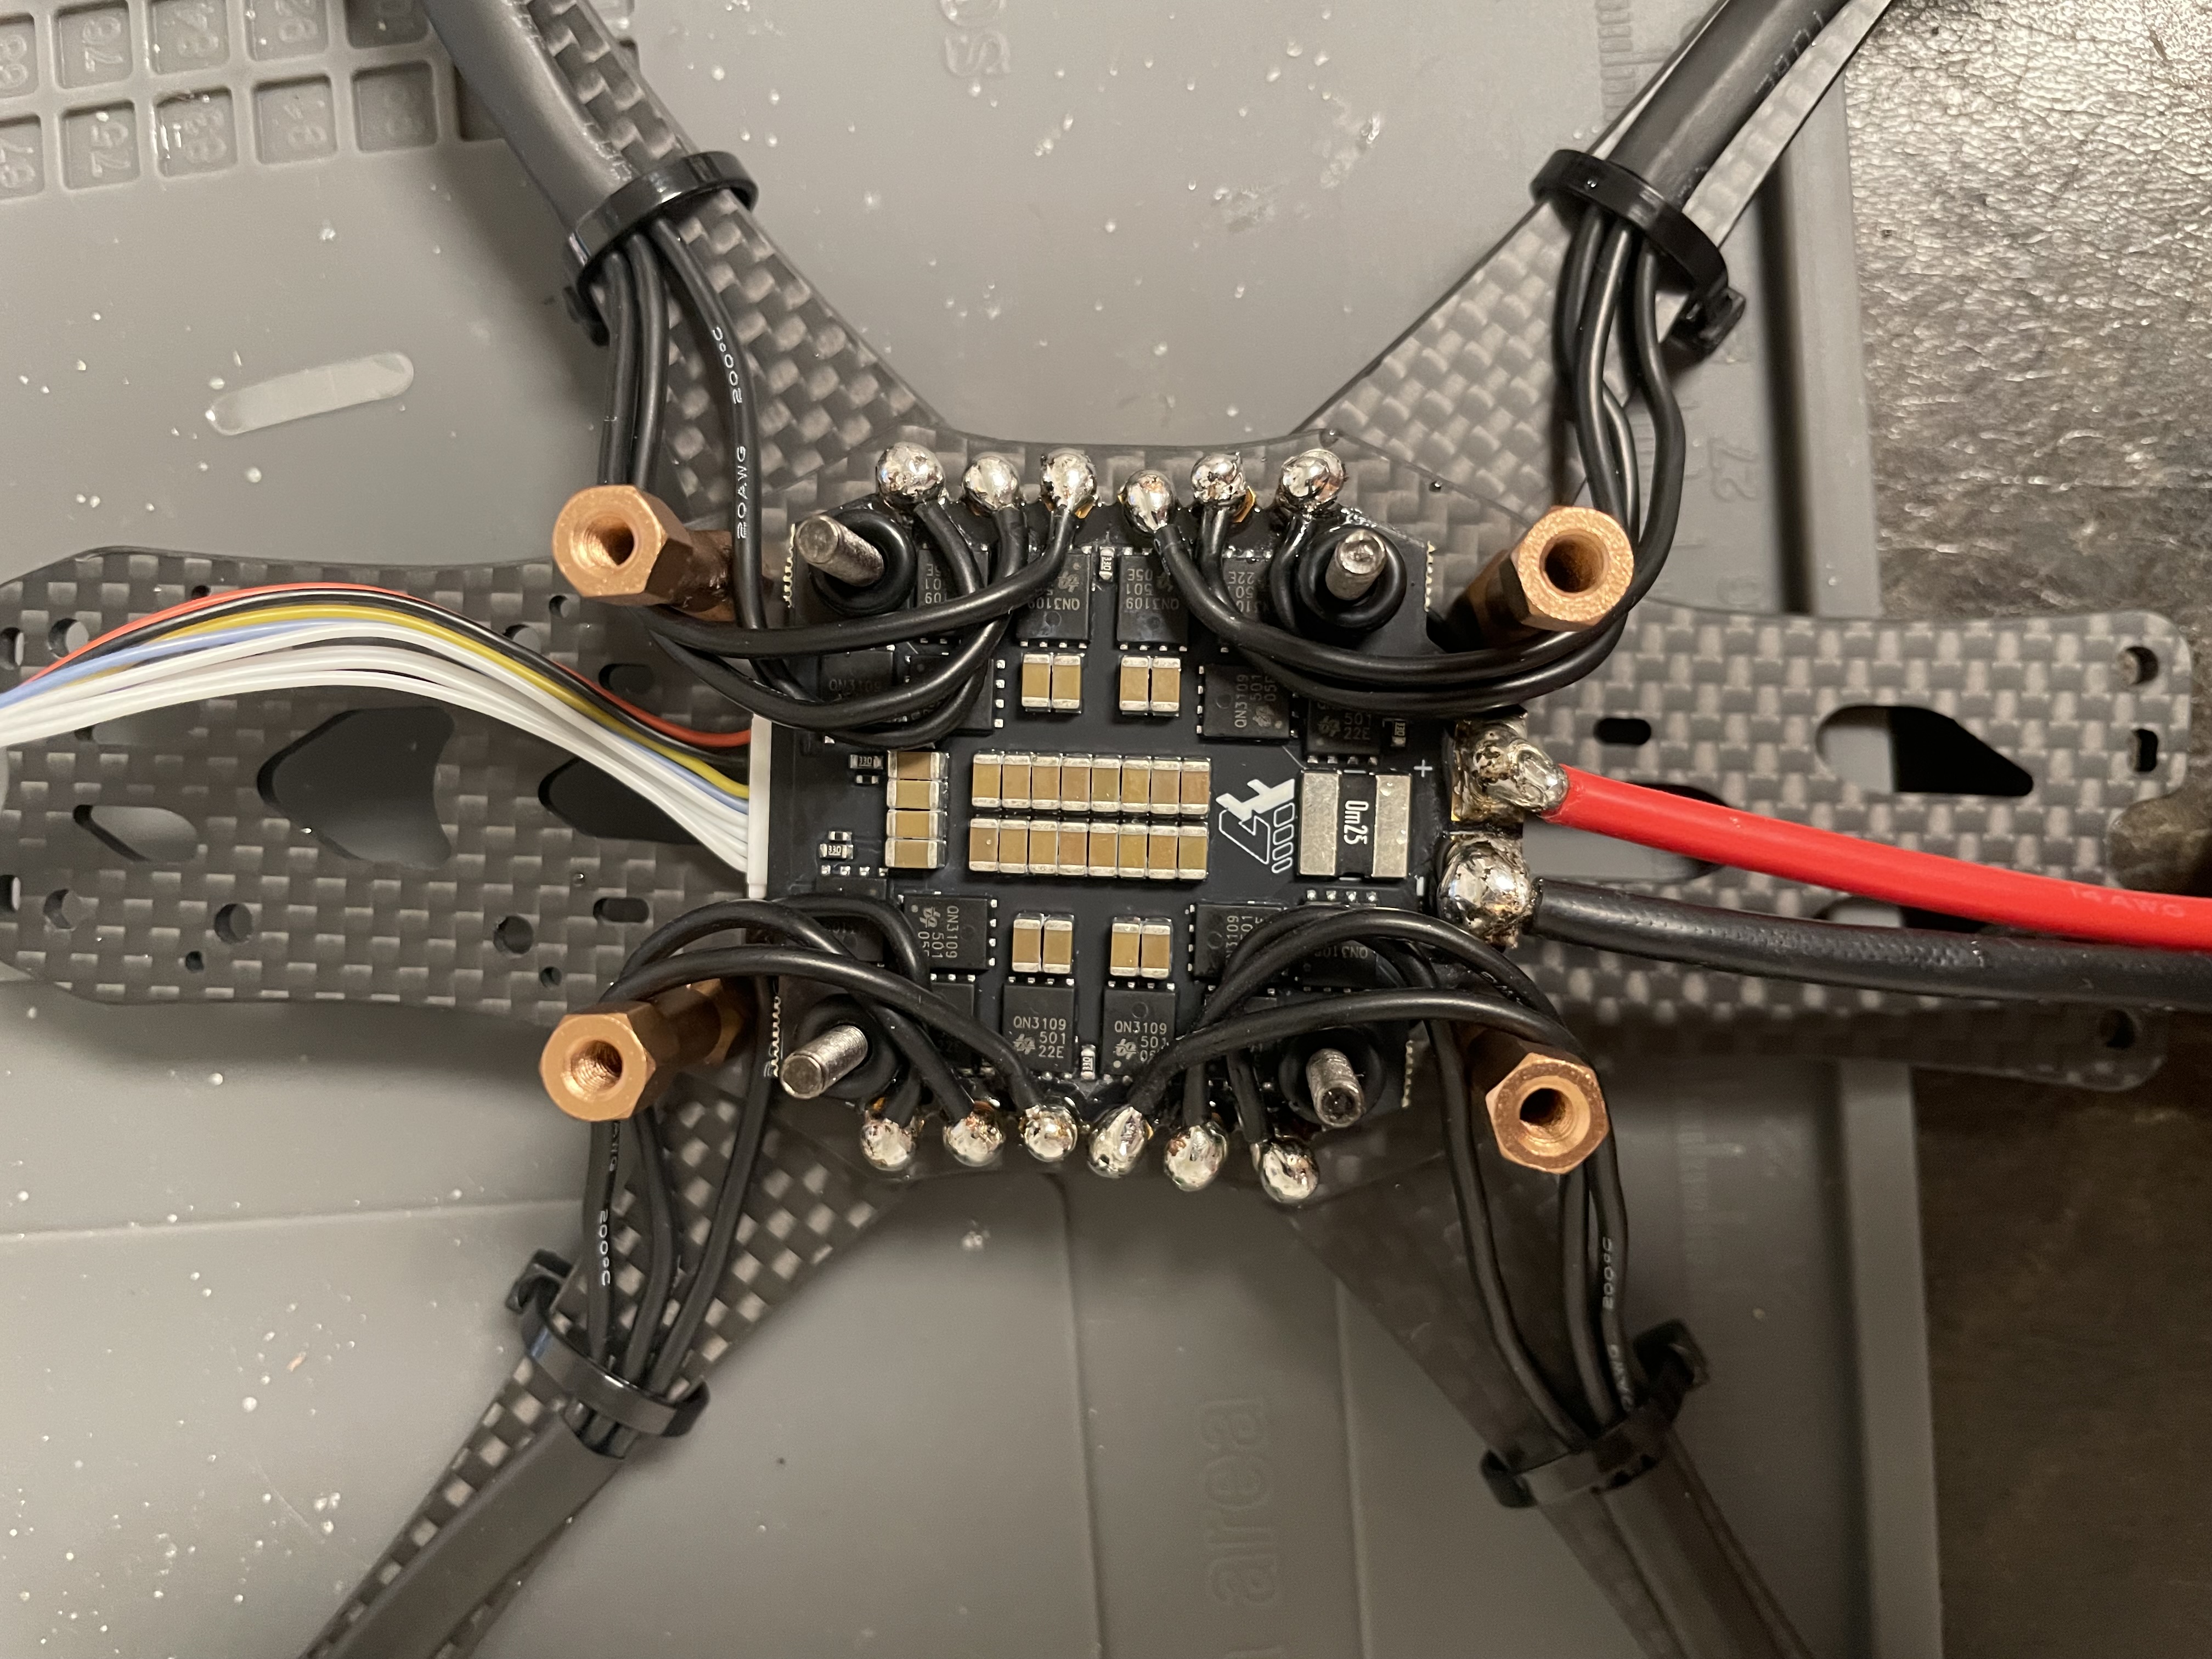
Now we need a way to communicate with our drone. Many routes we can take from here. I of course, chose the most expensive (help).
My setup is:
- DJI air unit 04 pro
- DJI fpv rc 3
- DJI goggles 3
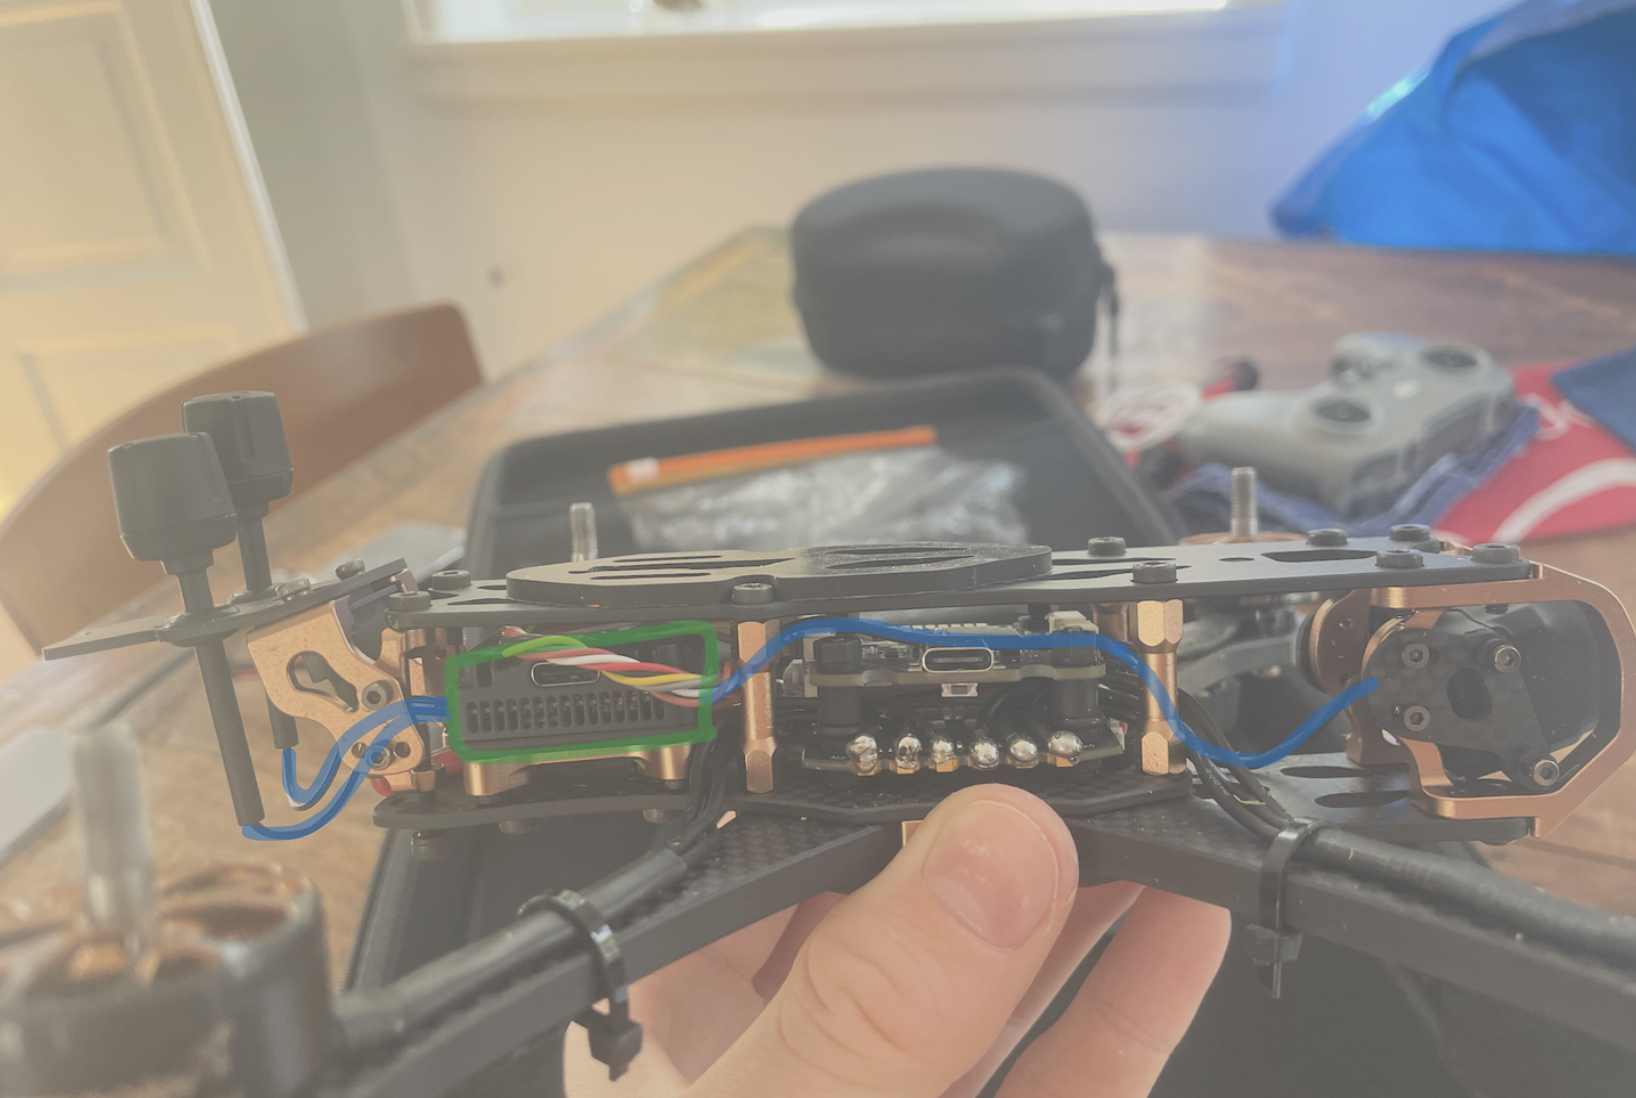
The air unit is responsible for the VTX, meaning the video transmission. Below you can see how the air unit connects both with the camera and the antennas.
Very simple overview of the connection flow below:
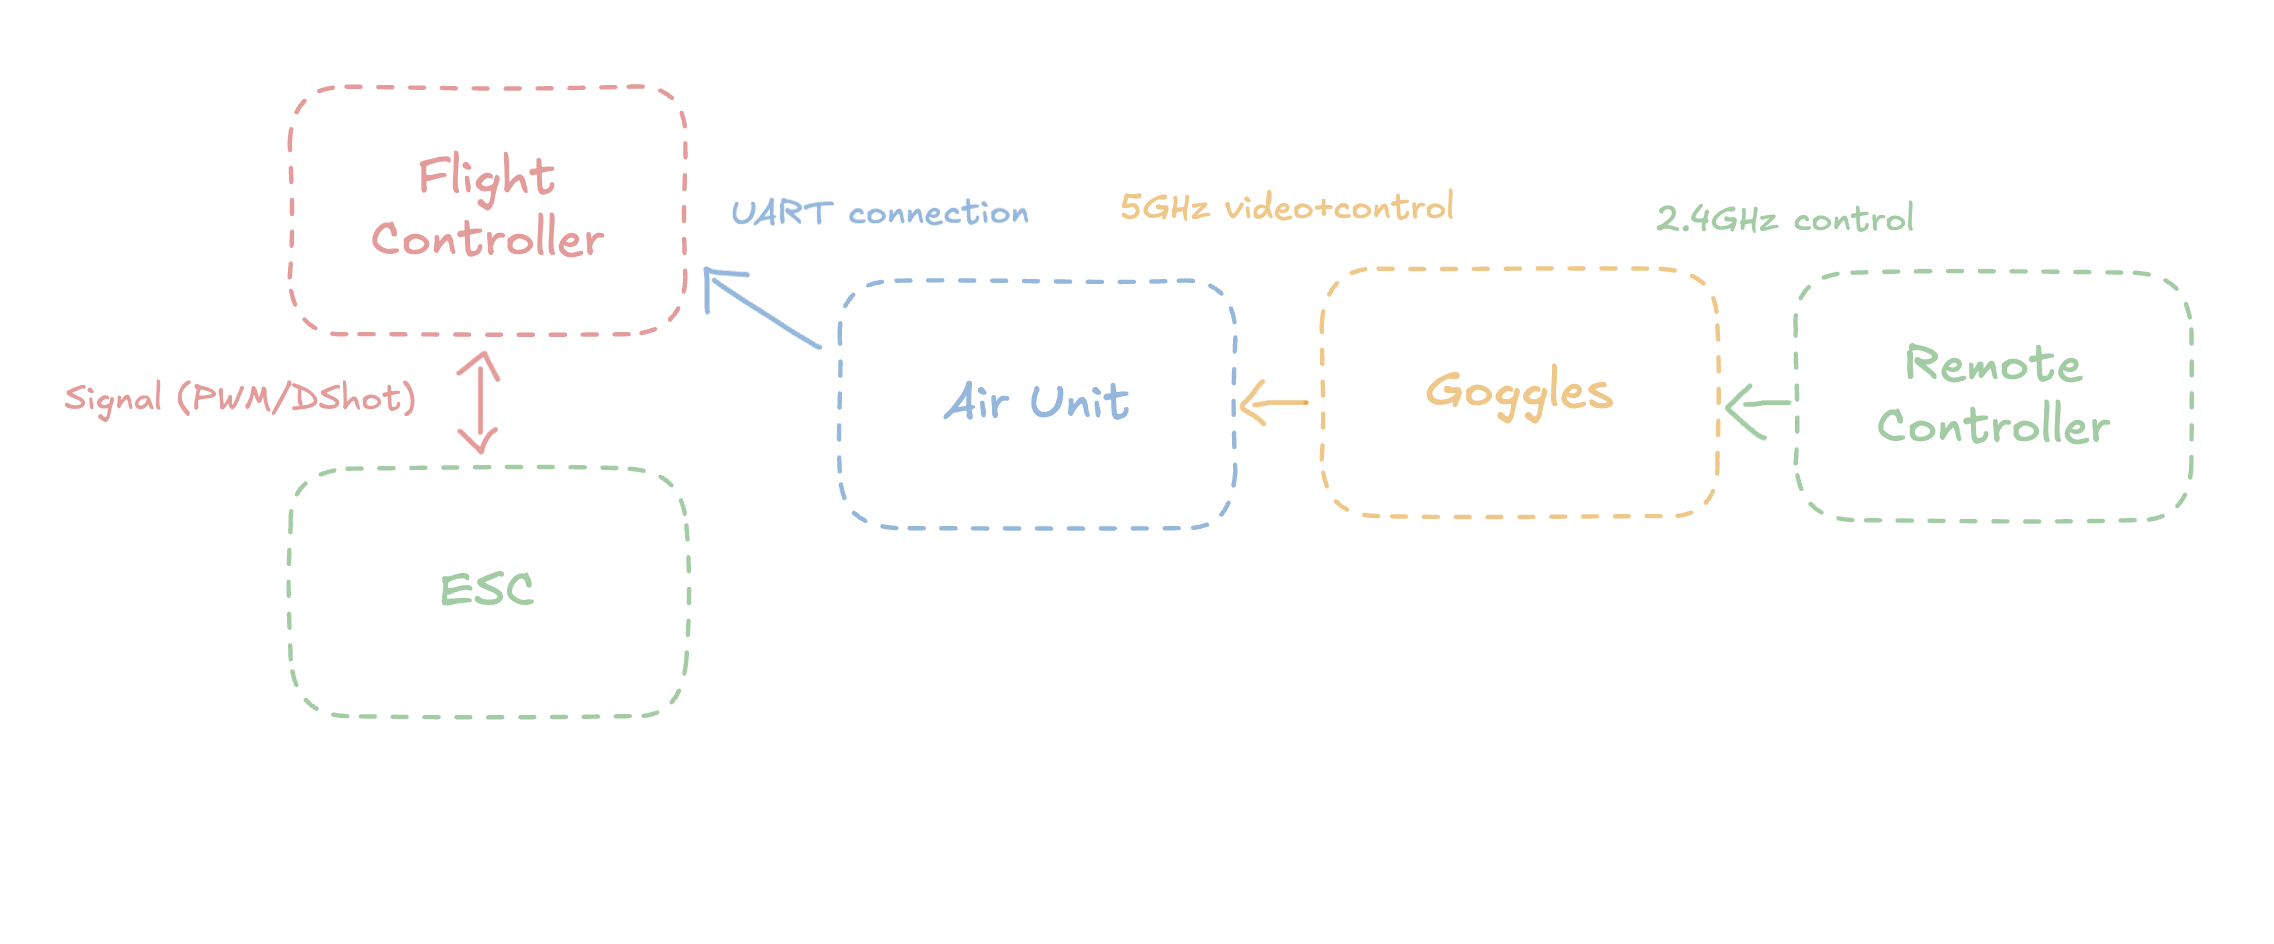
Typically, there would be a separate VTX module connected to the camera, which transmits via its antenna to your goggles. We'd also have a separate radio receiver, which you'd need to manually wire to the FC. But thankfully, the O4 Air Unit Pro covers both.
Now we are somewhat ready to begin flying.
Next steps:
- Ensure motor directions are correct
- Reset betaflight software so its aligned with the DJI fpv rc 3
- Port setup
- Calibrate orientation of the flight controller
Motor direction
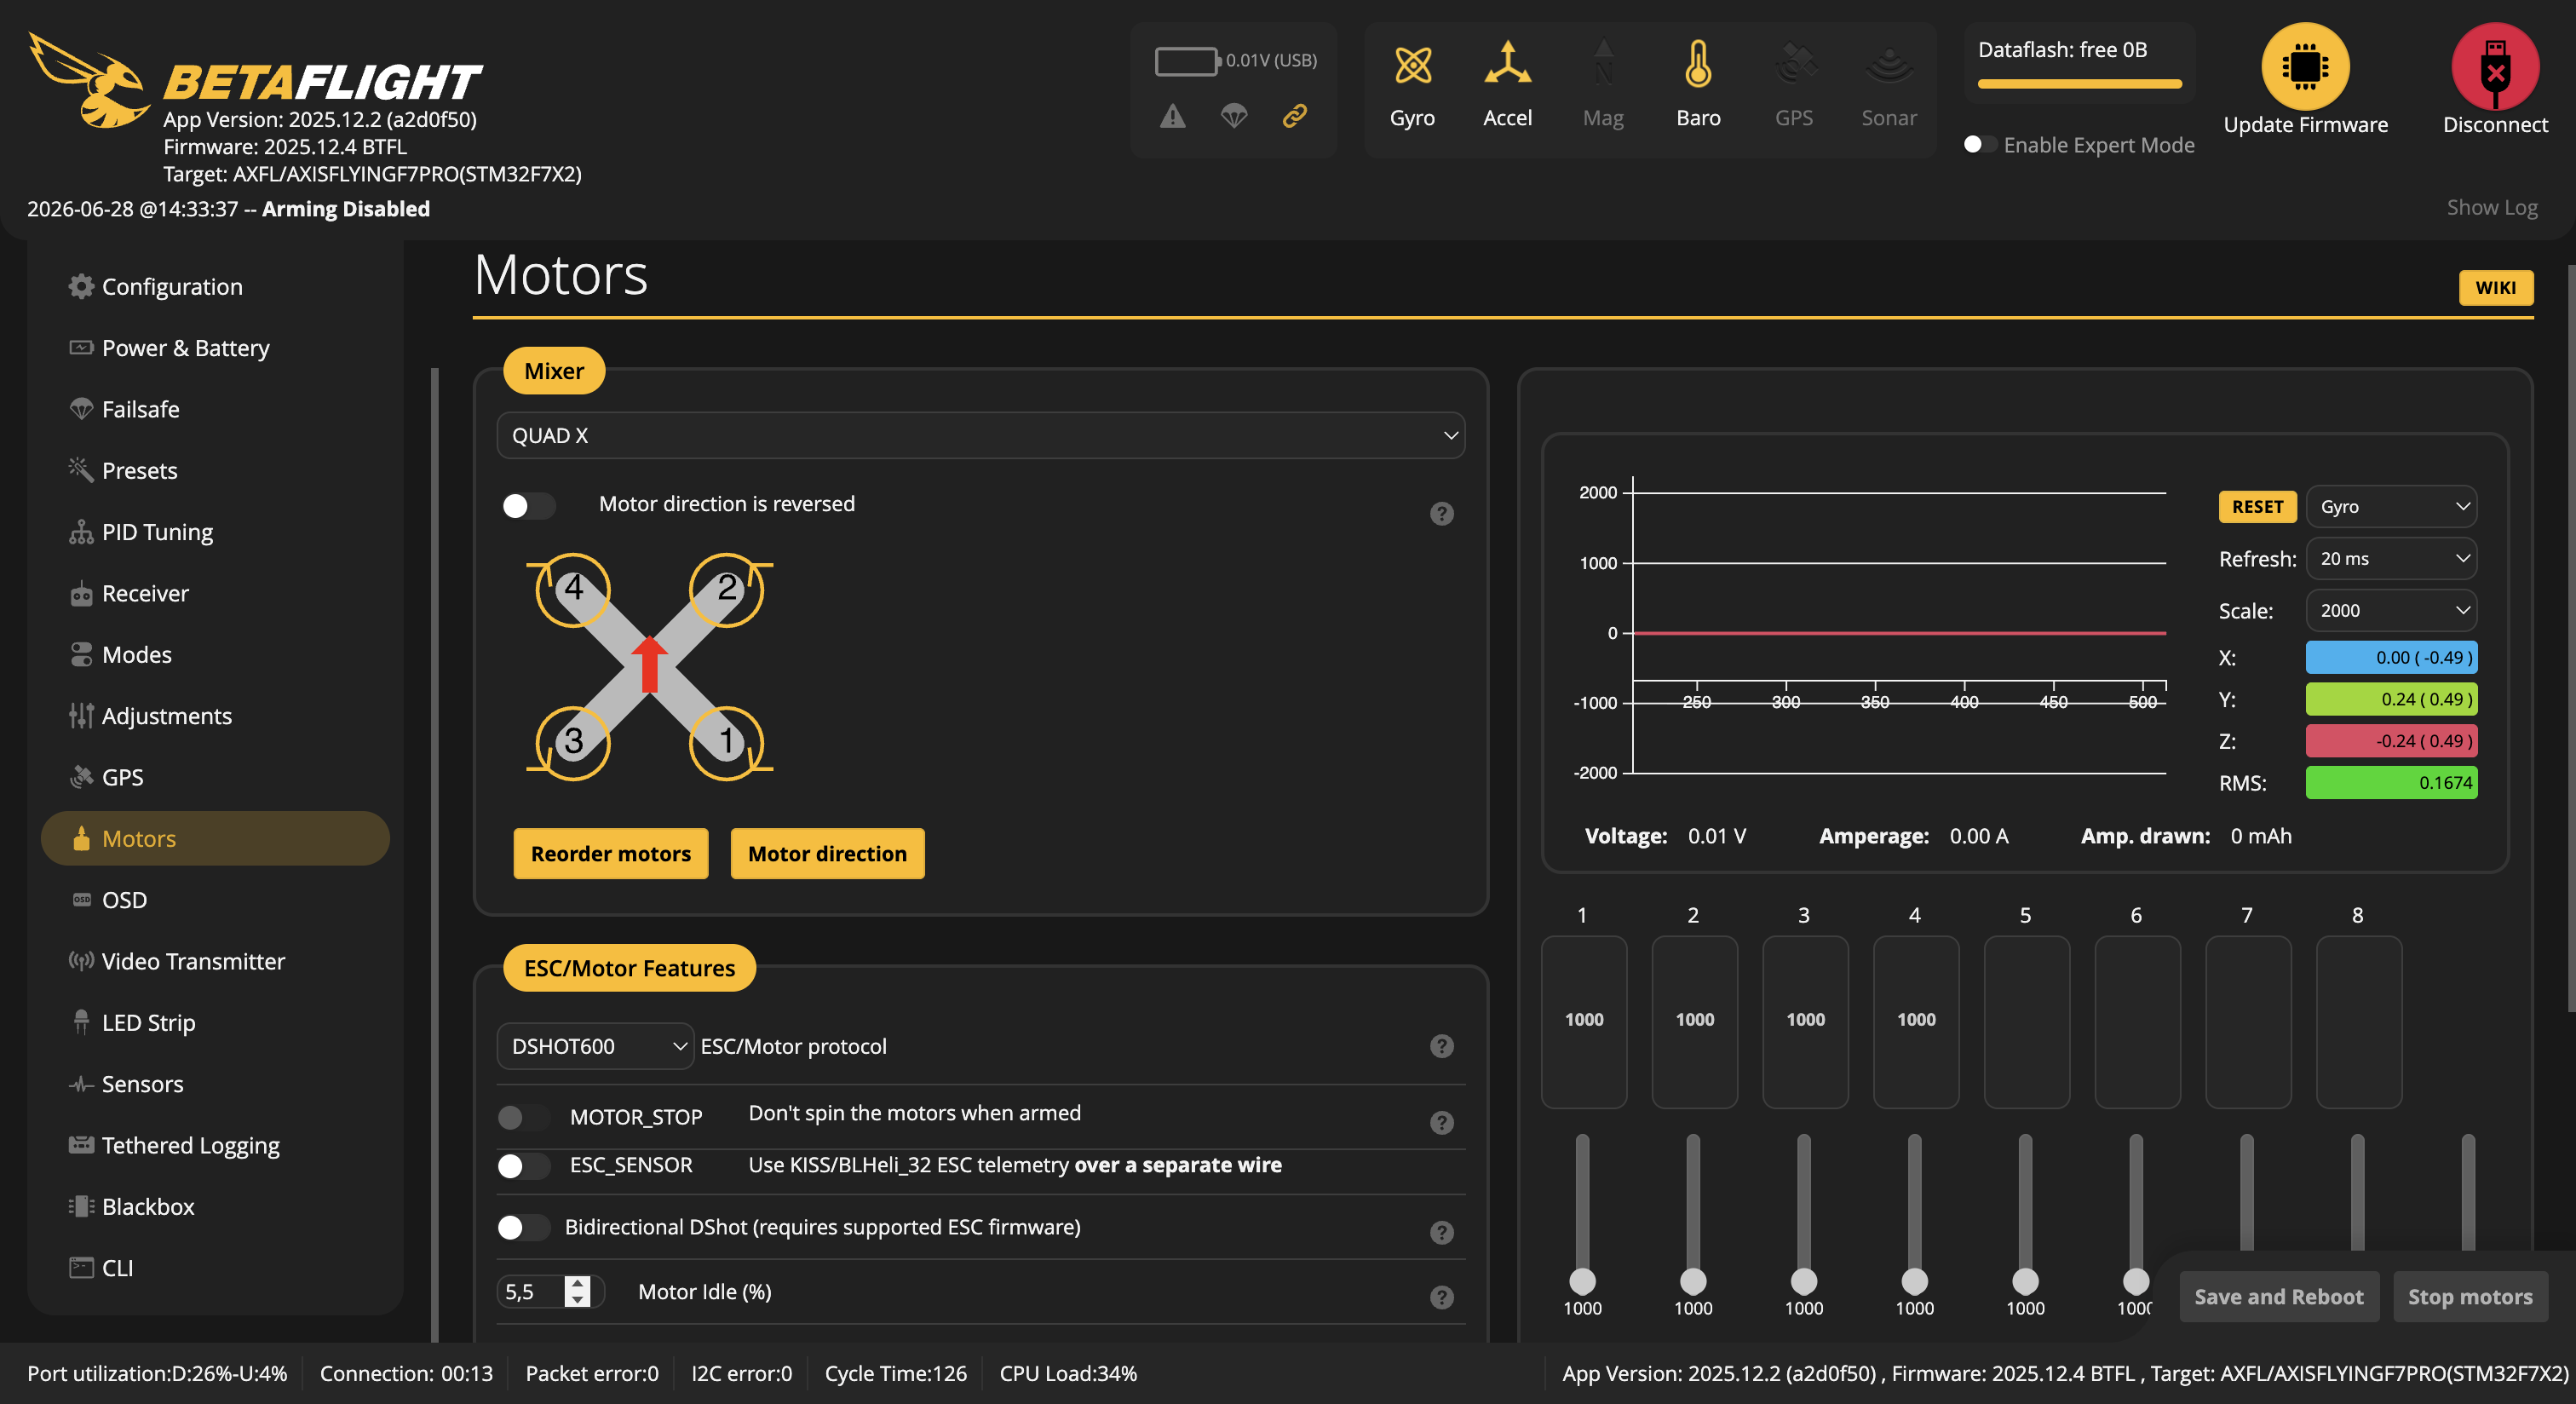
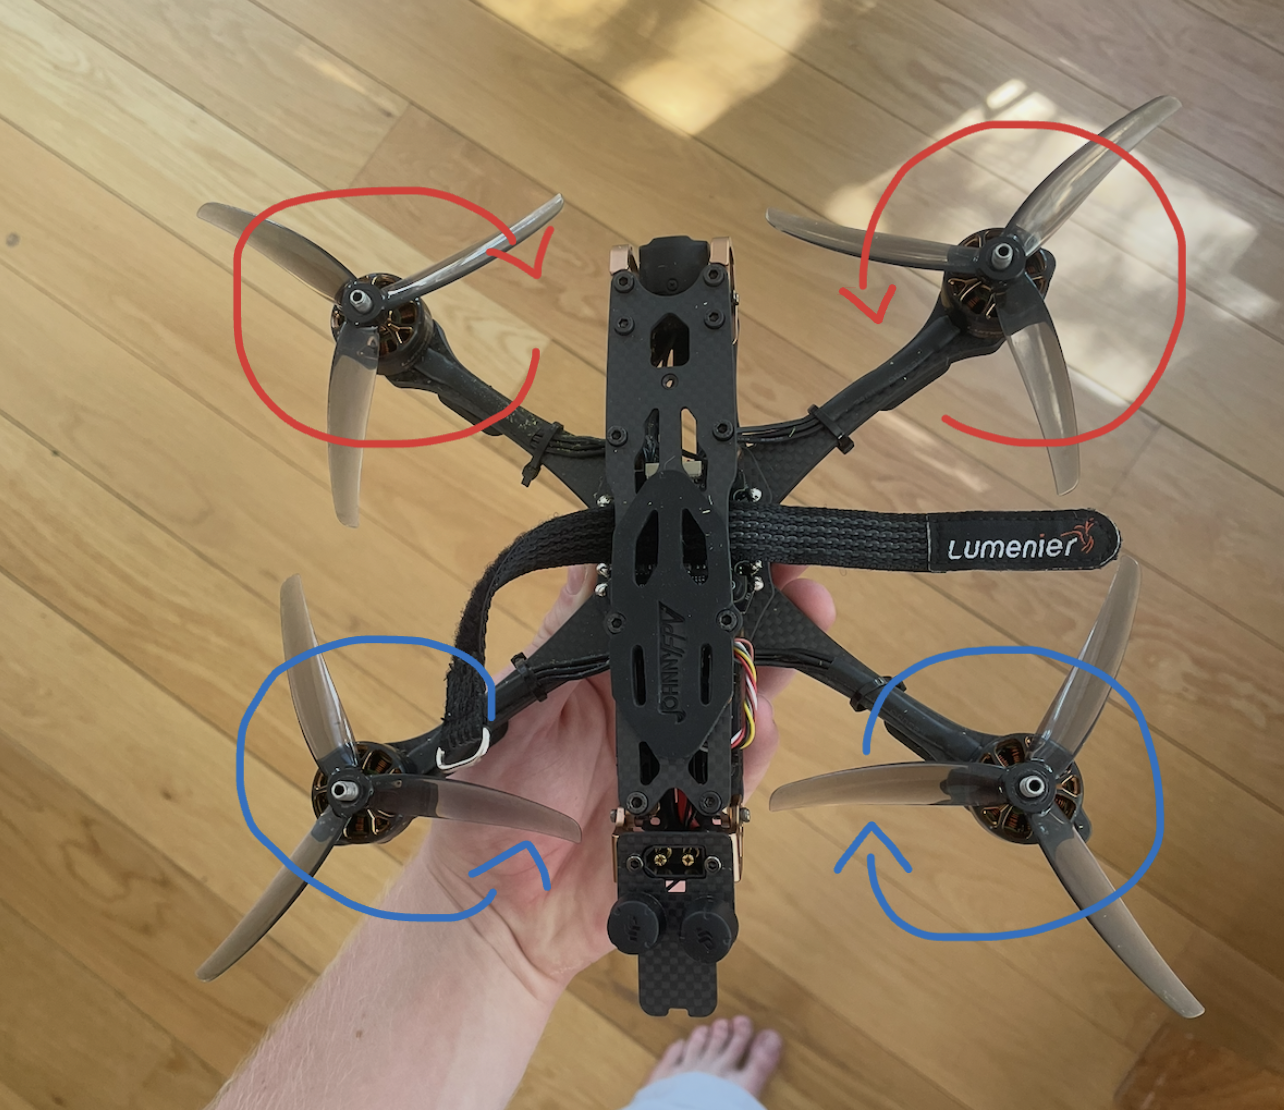
You can see the expected motor direction in the flight controller. Make sure that aligns with the actual motor directions, you can test this by taking off your props, and sequentially going through the motors and giving them some throttle. If the directions dont align, then you can simply flip it in the software.
SBUS alignment with DJI fpv rc 3
We need to make sure that our receiver also connects to the flight controller. And that the configurations are set correctly. Mine weren't. Following steps were needed:
- Reflash betaflight software with SBUS (mine was CRSF)
- Receiver tab: Serial (via UART) + Serial Receiver Provider = SBUS.
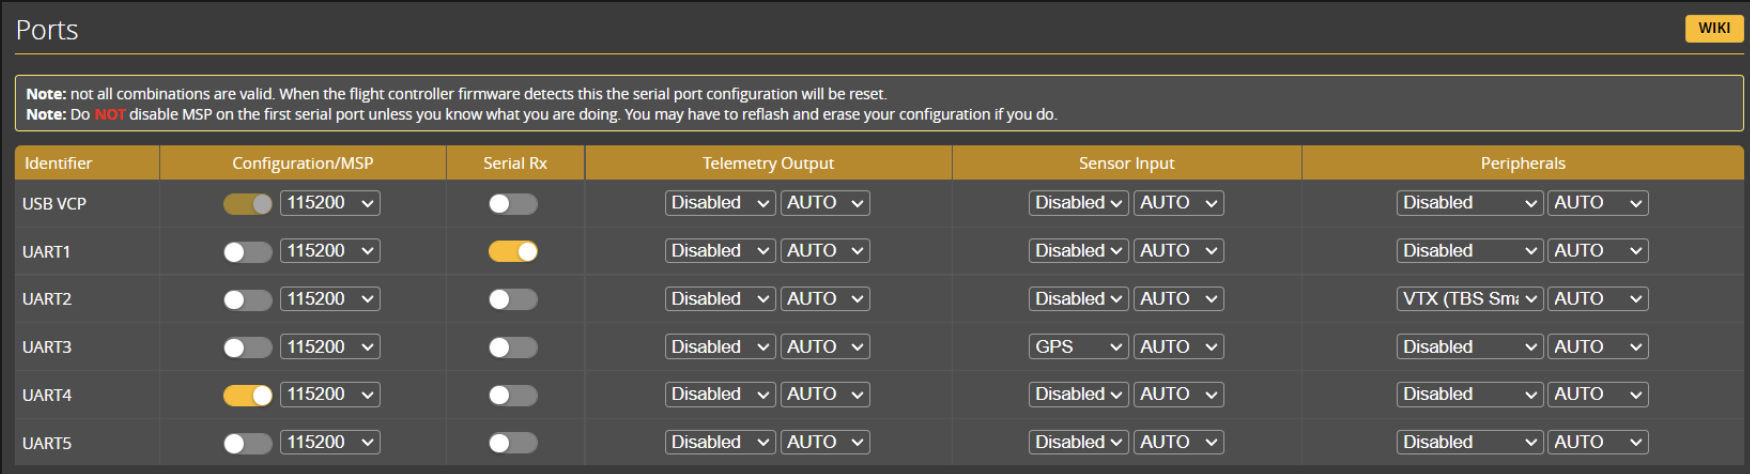
- Ports tab: Serial Rx ON for UART2 (where the O4's SBUS pin routes).
SBUS and CRSF are 2 different RC signal protocols (languages the receiver uses to send stick data to the FC). And SBUS just happens to be what DJI's O4/RC3 uses.
Ports
This ports tab gave me a bit too much trouble. UART = Universal Asynchronous Receiver-Transmitter
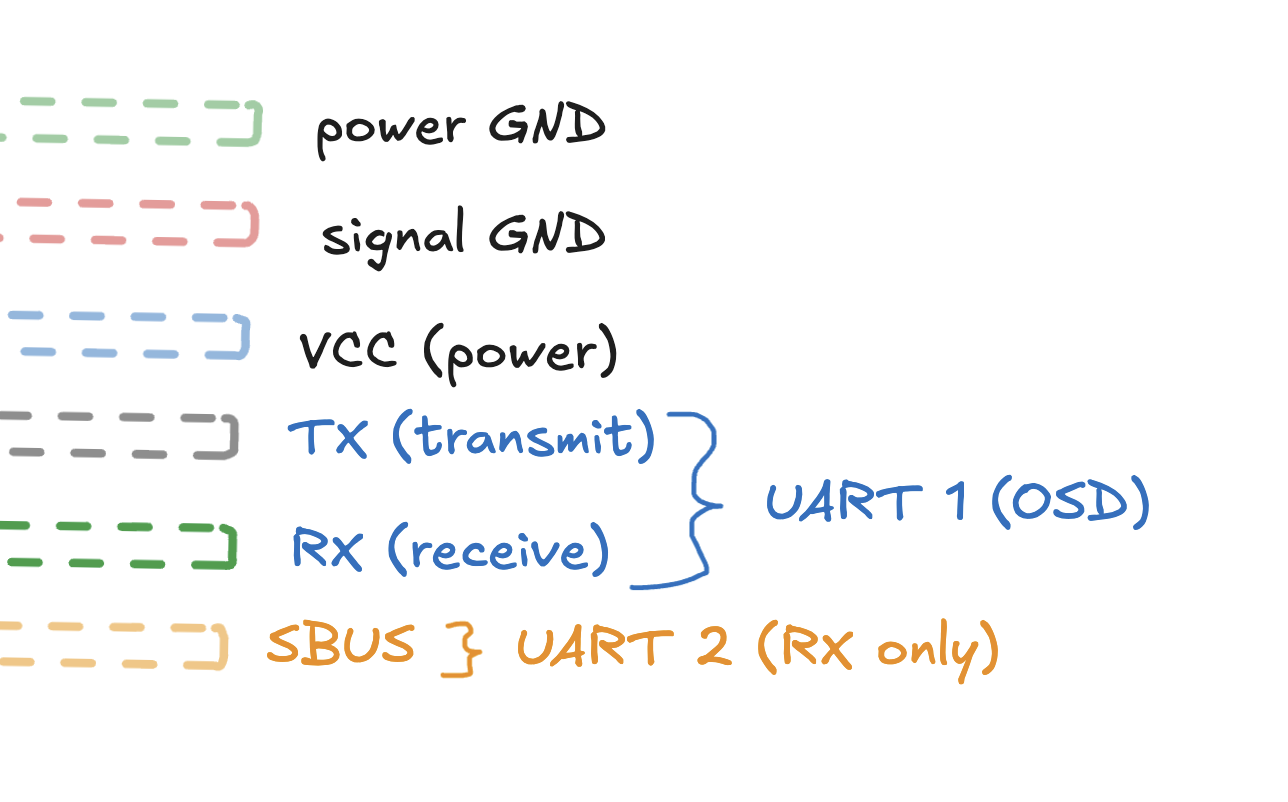
These ports tell us how our air unit communicates with the flight controller. There are in total: 6 wires. 1 for power, 2 for GND (signal and power respectively), 1 for RX, 1 for TX and the last for SBUS.
TX handles the signals we want to transmit to the the air unit from the FC, while the RX handles the signals we want to receive. These signals are for our MSP Displayport. The telemetry displayed in the goggles, the FC could for example transmit, speed, voltage, and other metrics you ask for, back to the goggles.
Now the SBUS, is a single wire, which handles the signals the FC receives from the RC. It's RX only as it only receives signals from the RC and doesn't need to emit any back.
Orientation Calibration
Now we need to ensure that the pitch, roll, yaw align with what the drone expects. If not, then the following can happen:
drone-flipping-due-to-wrong-orientation
This is one of the simplest issues to fix. Lift your drone, tilt it around, and see if it matches the orientation in the software. If not, go into Configuration tab. Where you can the change the angles of the yaw, roll, pitch respectively.
Fly :)
First test flight in open field
Hope this overview has been of some use.